Looking for a new way to display your plants around the home? Growing plants in water is a fun and inexpensive project that is great for beginners and expert gardeners alike. Plus it is one of the easiest ways to grow plants indoors - you never need to worry about over- or under-watering your plants!
There are three main types of aquatic plants that you can use. These include:
True aquatics (submerged plants): The entire plant, including the roots and foliage, are fully submerged in water.
Semi-aquatics (emergent plants): The roots of these plants grow in the water while their foliage extends above the water's surface.
Floating plants: These plants live on the surface of the water and are considered 'free-floating.' Their root systems are small and shallow.
Depending on how you want your water garden to look, all three of these types of aquatic plants can be successfully used to create an indoor water garden.
Once established, indoor water gardens require little ongoing maintenance. Semi-regular cleaning and water changes will ensure that the containers remain clean and free of debris, but otherwise, these aquatic environments remain fairly self-sustaining.
Learn how to create an indoor water garden in six easy steps.
What You'll Need
Materials
Clear glass container
Rocks/pebbles
Plants
Aquatic plant food
Filtered water
Instructions
Choose the Plants
The type of plants that you use for your indoor water garden mainly depends on how you want your water garden to look. Popular true aquatic plants include java moss, java fern, amazon sword, anarcharis, and anubias. If you prefer the look of semi-aquatic plants, many popular houseplants can easily be transitioned to growing their roots in water. Examples include pothos, philodendron, arrowhead plants, wandering 'dudes', calla lilies, spider plants, English ivy, and more! Popular floating plants include duckweed, water lettuce, water hyacinths, and Amazon frogbit.
Choose the Container
Any type of glass container that is watertight will work for an indoor water garden. Get creative here! You can use jars and vases that you may already have lying around, or check out your local thrift shop for inexpensive glass containers.
The size and shape of the container will depend on the type of water garden that you hope to make. If you are planning on using true aquatic plants, you will need a container that is large enough to fit the entire plant. Alternatively, if you are planning on using semi-aquatic plants or floaters, you will only need a container that can fit the roots/base of the plant, so you can get away with shallower containers.
Clean the Roots of Existing Debris/Soil
Regardless of the type of plant that you choose for your water garden, you will need to thoroughly clean the roots of any existing debris before creating your water garden. This will not only help keep the water looking clean, but it will also ensure that the roots can fully transition to water. Take your time here and be careful not to break too many roots. Once you have removed any debris or soil from the roots, gently hold the roots of the plant under running water to ensure they are completely clean.
Pot the Plant in the Container
Once the plant is ready it's time to put the water garden together. If you are using floater plants, this step can be skipped as you will add water to your container before adding the plants.
If you are creating a water garden with true aquatic plants, you will need to use rocks or pebbles (aquarium rocks are a great and inexpensive choice!) to weigh down the base of the plant in the container. Place the plant at the bottom of the container and gently add the rocks until the base of the plant is firmly secured. It is important that the crown of the plant is not fully covered with rocks as this will hinder root growth. Keep the top of the root ball slightly exposed.
If you are using semi-aquatic plants, you will need to place the roots of the plant in your container and hold the plant in place before adding water. You can use rocks and pebbles to hold the roots in place if desired, or you can allow the roots to grow throughout the entire container. It depends mainly on the look you are going for!
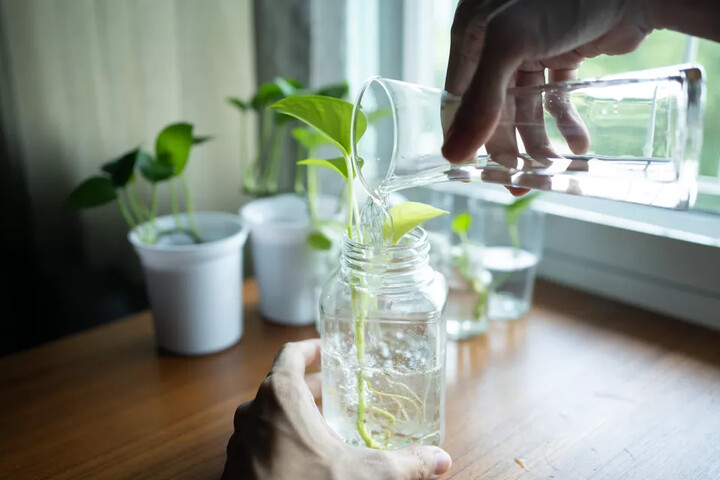
Fill the Container With Water
Once you are happy with your arrangement, it is time to add the water to your water garden. Filtered water should be used here. If you are using tap water, allow the water to sit out overnight so that the chlorine can evaporate fully. Ensure that the water is at room temperature and not too hot or too cold - you don't want to shock the plants!
If you are using floater plants, add the water to your container and then arrange the plants in the container to your liking. If you are using aquatic or semi-aquatic plants, you will be adding water to the container after the plants have been added so you want to do this carefully so as to not disturb your arrangement. Direct the stream of water off of one of the inside edges of your container so that the water is not falling directly on the plants.
Add Decorative Touches (Optional)
Once your water garden is put together it's time to add some decorative touches! Have some fun here! Ornamental rocks, crystals, figurines, aquarium decorations, and more all make fantastic finishing touches.
Once your indoor water garden is constructed it requires little ongoing care. Place it in a location that receives bright, indirect light for the majority of the day and is far away from any drafty windows or vents. Aquatic plant food tablets (available at most pet stores) can be used to provide ongoing fertilizer for your water garden. Be sure to read all package instructions thoroughly before adding anything to the water.
Every couple of weeks you will want to change out the water and give the container a quick cleaning. This will ensure that algae doesn't build up over time - which will cause the water to look murky and dirty. Take this time to examine the roots of your plant as well and remove any dead or dying pieces.